Learning Pods and Setting Tasks
Tips for using learning pods
Align to your curriculum Weekly Program Subject Specific work
Teacher Dashboard
Creating Learning Pods and Setting Tasks
Login to your Teacher account and on your dashboard.
Select “Learning Pods” Learning Pods
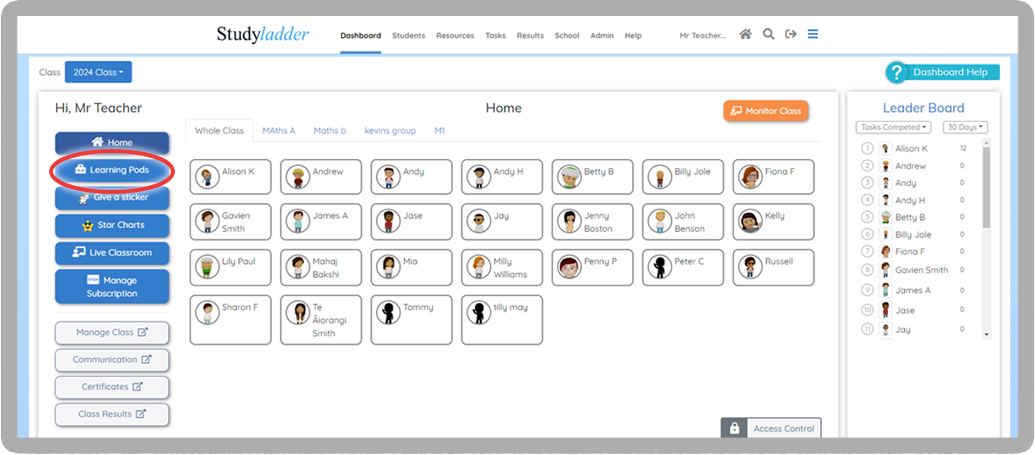
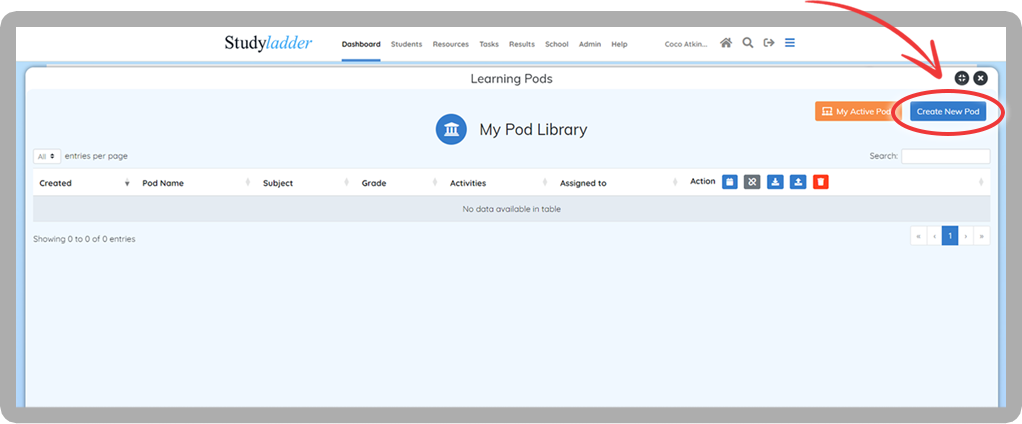
If you are new to Studyladder, you will have "My Pod library Displayed.
If you have used Studyladder in the past and have pods you have already created, you will see "My active Pods”.
My Pod Library page is where you can create, schedule, edit, download or delete your learning pods and, of course, assign or unassign them to students.
Let's start by creating a new pod for my pod library.
click 'Create new pod.
Resources
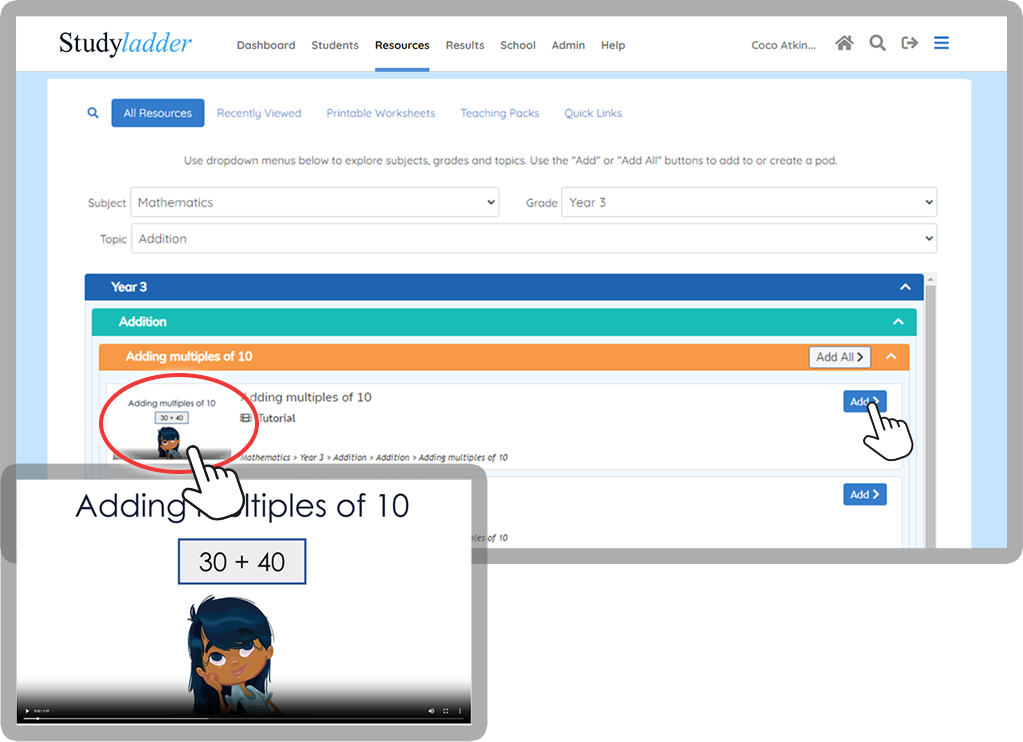
Create Learning Pods and Setting tasks
You can filter Studyladders content by Subject, Grade and topic to make it easy to find the tasks you want. Click the image of the task to preview or play
Click “Add” or Click “Add All” (this will add all the resources of the topic.)
General Pod Tips
Teacher view

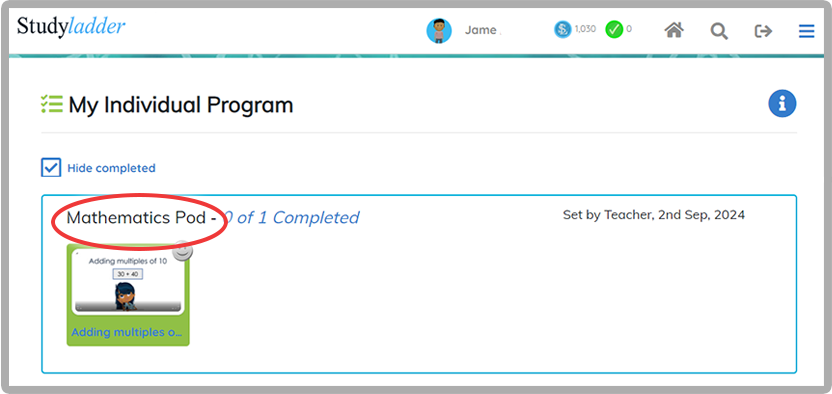
Student view
Naming Your Pods
The name that you give each pod is the heading that your students see.
You can use the pod names to structure your teaching by; day, week, subject or any other method you like.
In this example pods are named by week.
Students can see which pod they should do each week.
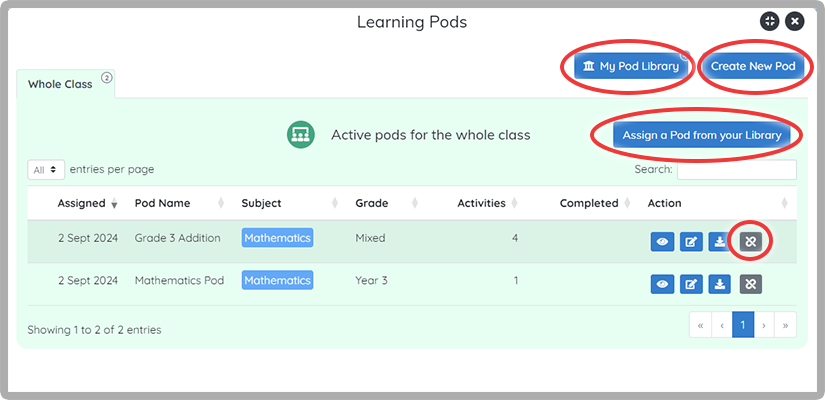
Assigning and unassigning Pods
Learning Pods can be assigned from your
“My Pod library” or
“Assign a Pod from your library” or
“Create a New Pod”
On the Active Pods page you can also Unassign Learning Pods by clicking the unlink button.
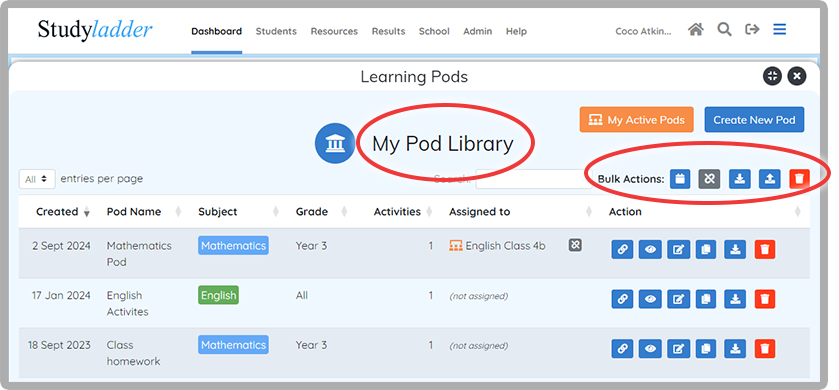
Pods that teachers create are stored in "My Pod Library" and can be reused for another class or group later on, shared with another teacher or edited.
We have “Bulk Actions”, which you see your calendar for scheduling Pods:
- Unassigning all pods, a great way to restart after holidays.
- Download your Pod library.
- Upload a whole Pod Library.
- Delete all Pod, makes it easy to refresh your whole library.
Help videos
Learning Pods Guide PDFs
Or jump straight in and
Create a learning pod
